Welcome back to the Node on ECS mega-walkthrough!
We hope you are excited to get stuck into part 2, where we will finally be running our Node app on ECS.
Feeling warmed up? Not yet? That’s OK. Because first we’ll talk about some updates to ECS that’ll get you more pumped than Steve Ballmer on keynote day.
Hot off the press at Re:Invent ’17
Since we published part 1, AWS Re:Invent happened – and boy have AWS given us a treat.
(that said, every year they smash it).
My colleague JT was there actually – tune in to his post where he gives you the lowdown on all the announcements.
Back on track: there’s one particular launch of interest to us here.
Can you guess what it is?
AWS Fargate, of course!
“Fargate” about instances
Fargate runs your containers, without needing to manage EC2 instances.
This is huge.

No but seriously: remember all that cruft we had to get through in part 1 to set up EC2 instances for our cluster?
We don’t have to do that anymore! 😁👏👏🎉
It obliterates a load of setup complexity and makes task placement a breeze.
Props to AWS for addressing a load of these gripes. This is something we’ve wanted since day 1.
Review part 1
In light of the Fargate release, we’ve made a couple of tweaks to part 1 of this walkthrough.
If you’ve already gone through that part, you might want to revisit and have a quick look at these updates – you now have the option to cut out the EC2 instances setup entirely and deploy straight to Fargate.
The plan
Right, let’s get suited and booted and bring this home. We will be:
- Preparing our app for containerisation.
- Shipping the code through our deployment pipeline.
- Running it with the ECS service.
1. Preparing for CodeBuild
Since you paid such diligent attention in part 1, you’ll recall we’re using CodeBuild to build a container from our app and store it in a container registry.
At deploy time Codebuild essentially spools up a disposable build environment and runs the commands you specify to build an app.
So let’s tell it how to smelt yours into a shimmery-shiny container.
We do this using a buildspec.yml file, and codebuild looks for it in your app’s root directory:
With a cursory glance you’ll notice this file is a list of shell commands and we are starting to talk to docker with these commands.
The actual building happens, as you can imagine, in the build section:
docker buildcreates a container image from instructions in aDockerfiledocker-compose run testruns our tests using the container image.docker pushwill publish the container image to the container registry.
Dockerfile
The Dockerfile dictates what goes in our container, so this is where we get a bit more node-specific:
We use alpine-node as the base for our image because it is super lightweight, weighing in at a spritely 66.7MB for node 8.9.3. Compare that against an equivalent Ubuntu image of several hundreds megabytes and we got a winner.
Our code gets mounted into the image by that ADD statement. This statement effectively says take all the files from our local directory and mount it into the container at /app. We then also set the container’s working directory to /app so that Docker runs future commands in this directory.
We install some additional build tools with apk. This helps npm install run smoothly when compiling deps with native modules.
Tweak as you see fit, but you should be good to mostly leave things as they are. The only thing you do need to change is your entrypoint path on that last line – this is the file node should run when ECS starts your app.
docker-compose.yaml
We use docker-compose (née Fig) to run tests at build time (presuming you have tests… otherwise skip this step)!
The docker-compose.yml file lets us easily define a container to run our tests, which will be using the container image we just built. All our source code is already in this container, so the code we’re testing is also going to be the code we deploy if everything passes.
Note: worth pointing out here that CodeBuild is currently unable to access resources in VPCs. So you can’t have your tests talk to something running in a VPC, in case you wanted to access some staging resources there. In these cases, we recommend either stubbing out the resources in your tests, or running them in other containers and linking them together with docker-compose.
What’re elasticsearch and redis doing in there?
This is to illustrate that docker-compose also lets us very easily link other containers to our tests, which is particularly useful if you’re using external services (for instance, Redis or ES). You can link these containers to your test container, and run your suite with these sandboxed services.
Note: some services need time to start up in their containers. For example, Elasticsearch takes a few seconds to initialise before it listens for requests. You may need to account for this in your tests, perhaps having them poll the service and wait for it to boot.
Hopefully this gives you a nice base to experiment – you could strip it back to just the test container if you wish. Define any necessary environment variables in the environment section, and tweak the test command in the command section to whatever you need to run your tests.
1. Recap
Great, having gone through the above, you should now have 3 additional files in your app’s root directory:
buildspec.yml– instructions for CodeBuild.Dockerfile– instructions to build Docker container image.docker-compose.yml– container definitions for running tests and resources for tests.
Once you’ve got that checked into source control, we’re ready for the next step: initiating your first build.
2. Your first build
Now let’s turn our attention back to the deployment pipeline we set up in step 1 (the “Ship-it” stack).
Assuming you’ve got that rolled out with CloudFormation, heading over to the CodePipeline console should reveal something that looks like this:

This is your deployment / CI pipeline.
- Step 1 pulls your code in from a source repository (GitHub in our case).
- Step 2 puts it through CodeBuild which builds the container image and uploads it to the container registry.
- Step 3 tells ECS to deploy this new container image.
Initiating a build
CodePipeline watches the branch on your source repository so simply pushing new commits to this branch will trigger a new build. Alternatively, you can hit the “Release Changes” button in the UI to start up the pipeline.
As the build progresses, you can monitor progress in the UI and by inspecting the logs for each stage. 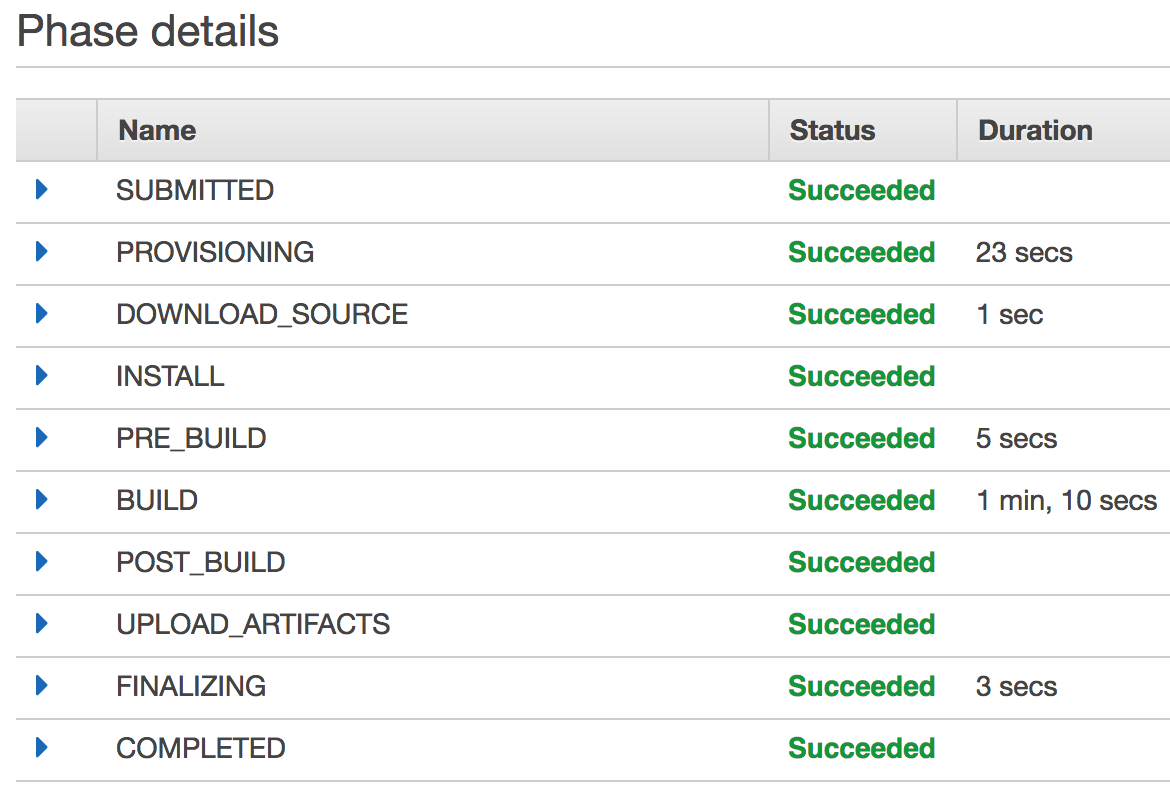
CodeBuild sends all build logs to CloudWatch where you can see all the output from your build and the test suite running in the build environment.

Once everything is built and passing, the docker push step of our buildspec.yml will upload the container image to our container registry, ready for ECS to pick it up.
3. Deploy
The moment we’ve all been waiting for. Let’s get the great wheels of ECS turning!
Now, the first time you run a build you’ll find it won’t actually deploy anything. That’s because our ECS service is set to run 0 tasks for our app.
Now that we’ve got our first container image built, a deploy is just a setting away.
All we need to do is change the desired task count on our ECS service. You can do this in the ECS console / CloudFormation / CLI tools – however you like. Setting the desired task count to > 0 will kick off a deploy.

If you’re deploying to your own cluster of EC2 instances instead of Fargate, don’t forget to add some instances to your cluster! You can do this easily by setting the desired number of instances on your auto scaling group.
ECS deployments
Let’s take a little time to explain how ECS deployments work.
An ECS service tries to maintain a desired number of tasks, which we set to a discrete number. If the number of running tasks does not match this number, ECS will start / stop tasks as necessary until the target number of tasks is achieved.
Looking at a few scenarios:
- Changing desired tasks from 0 to 1: It will simply spin up the desired number of tasks you specified.
- Changing desired tasks from 1 to 6: It’ll allocate as many tasks as there is capacity for. On Fargate this is unlimited, on EC2 instances this is constrained by your remaining unallocated EC2 instance resources.
- Changing desired tasks from 6 to 2: ECS will drain your tasks from any load balancer they are part of, and then SIGINT your process. You can intercept this signal to perform any necessary cleanup before shutdown. ECS forces tasks to stop if they don’t shut down within 30 seconds.
Updating your app
To deploy new versions of an app we can follow the same process as above, except this time we are replacing existing tasks with new ones running the latest version.
You can dictate exactly how this is handled: whether ECS replaces tasks in a rolling fashion, or all at once.
In this walkthrough we configured our service with DeploymentConfiguration.MinimumHealthyPercent: 50 which is to say that ECS will ensure there are always at least half of our desired number of tasks running at any one time while it replaces the remainder with newer versions. This can obviously be configured as necessary.
How does this work?
Remember the Lambdas we set up in part 1?
When CodePipeline gets to the Deploy stage, it invokes the Deployer Lambda to start a deploy. The Deployer lambda is told which service to update, and an identifier for the container image (you can see all this wired up in the “Ship-it” CF stack).
The actual deploy is achieved by copying the most recent task definition for the service, and creating a new one. Lambda then updates the ECS service to use this new task definition. ECS will start pushing out new tasks with the latest version, because the task definition is set to always use the latest container image from the registry.
Autoscaling
You may have noticed that a good chunk of our CloudFormation templates were jabbering on about CloudWatch alarms and Autoscaling groups. These are all part of the recipe to help you quickly scale up your app in a flash, and save money during quiet times.
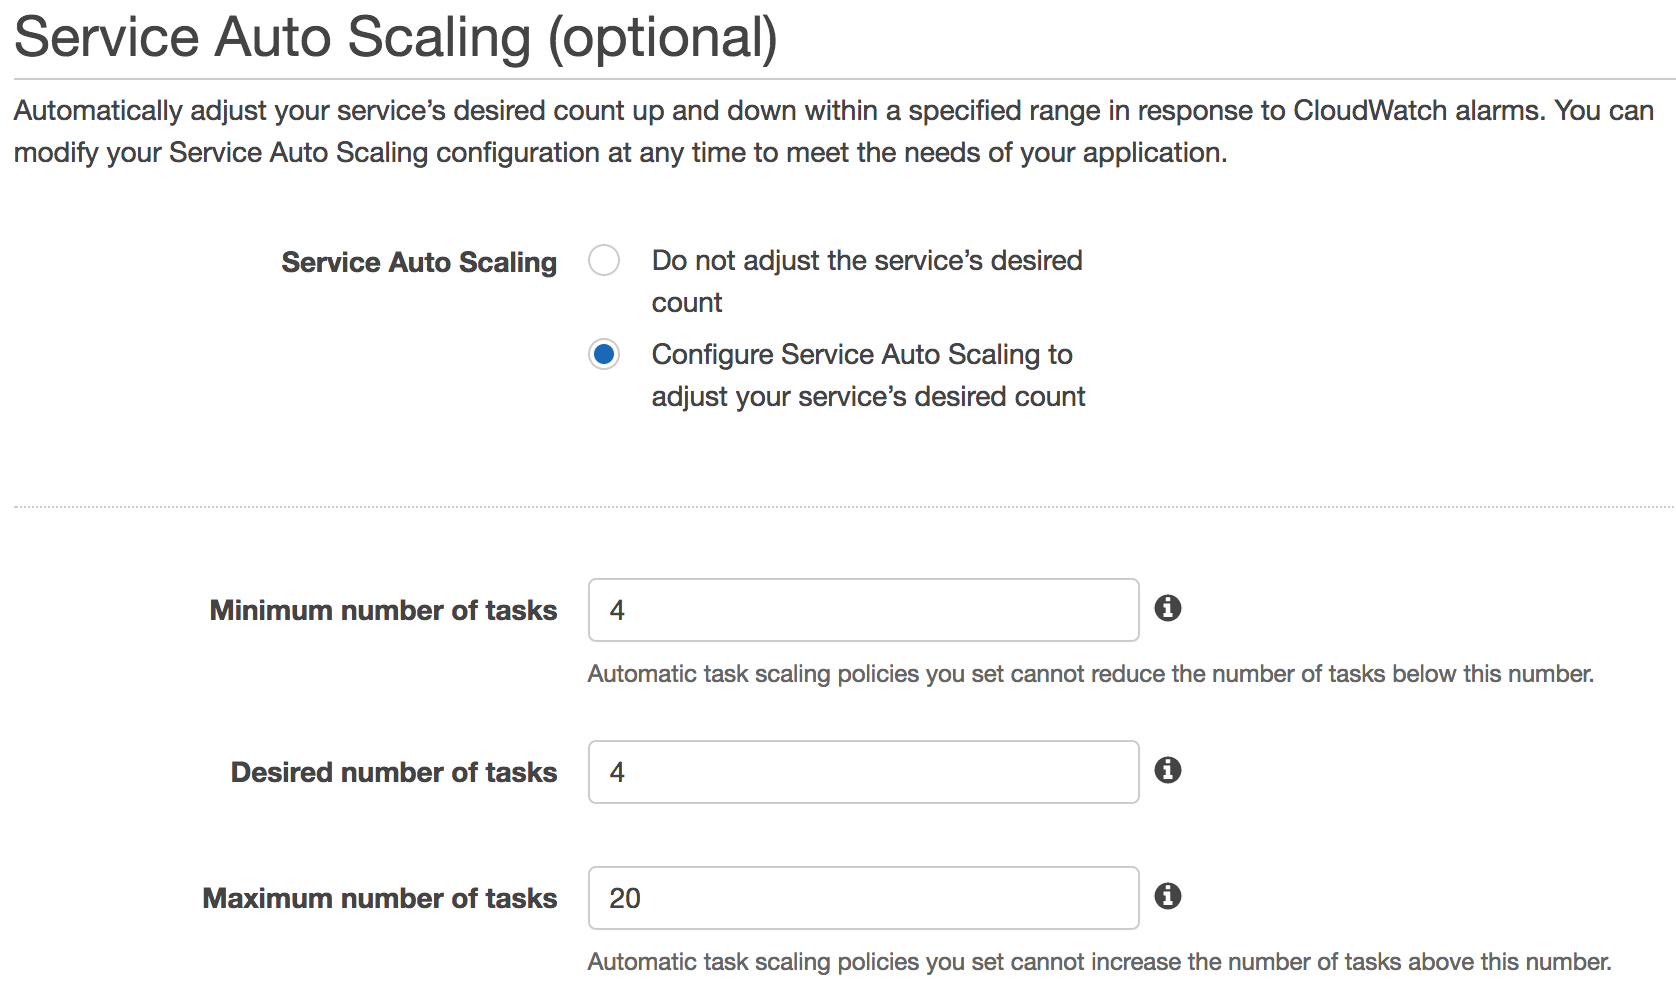
Since every app has different load characteristics, you’ll probably want to customise the various alarm thresholds and scaling policies, but we’ve tried to set sensible defaults.
Updating ECS service / CF stacks
A word of warning – be careful when updating your ECS service and CloudFormation stacks. There are a couple things you’ll want to check to prevent anything nasty happening:
- Check that the desired count settings on your autoscaling groups / ECS service do not accidentally overwrite their current values in AWS. You can remove the statements from the template once the stacks are created, or just mirror the correct count when you update the CF stacks.
- Some settings are immutable and require re-creation of the ECS service or other resources. It’s usually helpful to use changesets to check all of the resources that will be re-created or changed.
Logs
You can find your app logs by going to the CloudWatch logs console and having a look for the app name.
Each log stream contains the logs for a single task, and you can view and search across all of them with the Search Log Group facility.
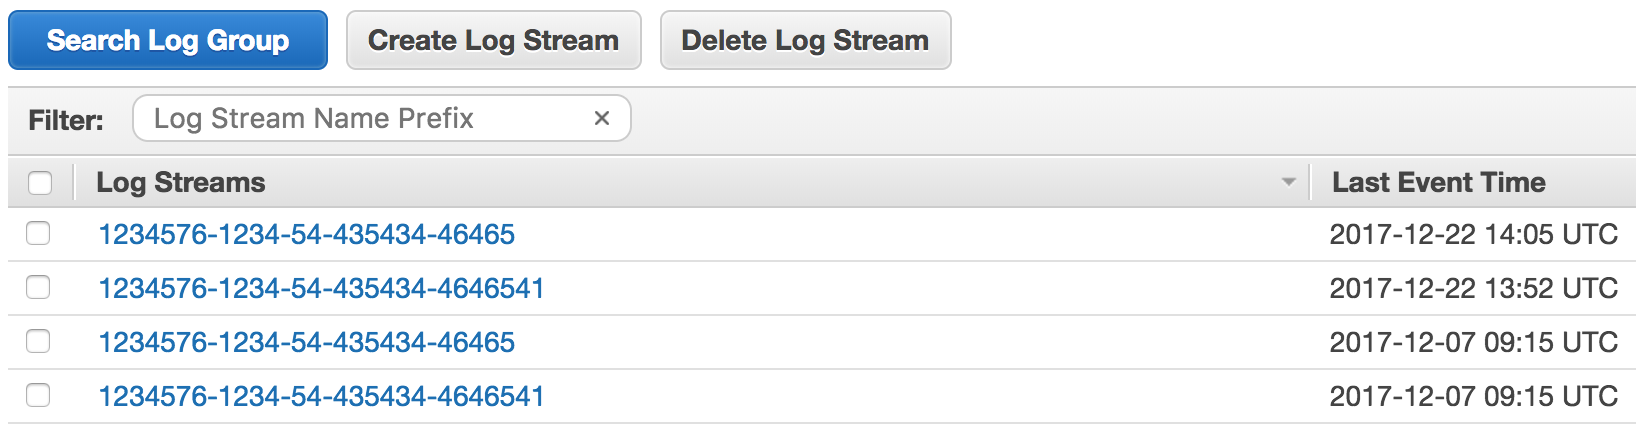
awslogs is also a handy tool for viewing logs in the cli.
Metrics
Keep your app in check with ECS’ built in CPU / Memory metrics.
ECS reserves resources for each task as defined by our task definition. It then shows how much of this reservation is being consumed, so you can keep tabs on CPU / Memory usage of the app itself.

These metrics also drive autoscaling triggers, whereby we can scale up desired count / instance count based on resource usage of the service.
Furthermore, you can of course set up additional actions on the metric alarms to be notified of anything awry.
Closing
That’s it! You should now have your Node app running on AWS with all the bells and whistles of ECS.
ECS will keep your app running, replace broken processes, scale it up and down, and keep it logged / monitored.
You also have a CI/deployment pipeline to help you continuously ship code out to ECS.
Hit us up in the comments with any questions or thoughts!