Deploying code to your servers is tricky, and there are so many ways to do it. You could FTP your files onto the server, if you’re stuck in the ’90s. There’s rsync or a straight up git clone if you’re hardcore like that but don’t have many servers or have loads of time to waste. Maybe you’re trendy and adopted Capistrano when it was cool. Or maybe you don’t really care and just use Heroku. All we know is, we’ve tried every one of these methods over the years and got fed up with every single one of them.
That’s why we decided to put together a deployment process that actually works. A process which appeases our apathy by concealing the monotonous deployment chores with configurable autonomy. A process which we can set in motion with a single git push and it’ll hopefully ‘just work’ by ‘doing the right thing’. What’s more, it’s (usually, unless it breaks) something we don’t have to even think about. And because it works quite reliably, we’d like to share how it’s been put together with you, in case you’re looking for inspiration in this area.
The Setup
The whole process involves the following parts:
- Source control & hosting
- Continuous Integration (CI) server
- Build, test & package phase
- Deployment phase
1. Source control & hosting
First off, the basics. Our use of source control is pretty standard, but it’s good to get the foundations covered.
Source control using a version control system (VCS) is essential, especially if you are working as a team and collaborating on the same software projects. It’s also an important part of the deployment process. With a VCS, you can “snapshot” different versions of your software using tags, allowing you to easily switch between different versions when deploying. This is particularly useful if a particular version ends up being faulty and you need to revert to a previous version while a fix is developed.
We use git for all of our projects. Each of our projects has its own git repository, with the remote copy hosted on GitHub. Every engineer working on a project will have their own local copy cloned from this remote, and can collaborate through it.
During development, the master branch always contains the latest production-ready code, and mirrors the version we have running in production. New development happens in feature branches. Feature branches undergo extensive testing locally and if necessary, in a staging environment. Once we are happy to release, the engineer performing the release will merge the pull request, bringing the code changes into the master branch. That latest code on master is tagged as a version, using semver rules (e.g. v1.2.0).
The master branch and corresponding tags are then pushed up to the remote server. This sets the deploy wheels in motion. We’ve configured each of our repos on GitHub to hit a webhook every time new code is pushed to master. This webhook points to an app called ‘autobuilder’ running on a server. On receiving this request, autobuilder initiates a build for that project on our Continuous Integration (CI) server.
Continuous Integration (CI) server
Our CI server runs Jenkins CI. Yes, Jenkins is a bit of a clunky dinosaur, but he’s highly configurable, extensible and pretty reliable too.
Each of our projects has a corresponding project configuration in Jenkins. This configuration contains all of the build steps and environment settings required to build and deploy that project.
When the build is initiated, Jenkins execute these build steps sequentially. Let’s go into a bit more detail on what these build steps do.
Build, test & package phase
Most of our projects are node.js apps of some description. They all have a set of bash scripts that deal with installing dependencies and other tasks necessary for building the app. The most important scripts are:
./app setup – Installs the node.js version this project requires, and then runs an npm install to install all of the dependencies
./app ci-deploy – This is run only by the CI. It invokes our deploy script and pushes the app out to target servers.
When deploying, the project’s git repo is cloned to the CI, the CI cwd‘s to this local repo and the following build steps are run:
bash -l -c "export NODE_ENV=production && rm -rf node_modules && ./app setup"bash -l -c "TAG=${BUILD_TAG}-prebuilt NODE_ENV=production ./app commit-deps"bash -l -c "git archive -o /mnt/gs-builds/$JOB_NAME.tar ${BUILD_TAG}-prebuilt"bash -l -c "s3cmd -c ~/.s3cfg put /mnt/gs-builds/$JOB_NAME.tar s3://$S3_BUCKET/$JOB_NAME/$JOB_NAME.tar"bash -l -c "TAG=${BUILD_TAG}-prebuilt NODE_ENV=production BRANCH=${BUILD_TAG}-prebuilt ./app ci-deploy"bash -l -c "git gc --prune"
Let’s look at what each one of these steps is doing:
- Set NODE_ENV to production to tell npm to install production dependencies. Remove any existing node_modules directory and run the app setup scripts.
- Run the app’s
commit-depsscript. This script commits the apps dependencies to the local git repo cloned on the ci and tags it as$TAG. - Once all of the dependencies have been checked-in, export all of the files to an archive file using
git archive. - Upload the archive file to an S3 bucket containing the latest builds for the projects. This archive is automatically grabbed by new servers when they are booted by autoscaling and need to install the latest build of the app.
- Run the app’s
ci-deployscript. This script runs our deployment phase. See the next section of this post. - Run a cleanup on the local git repository on the CI. This clears out any extraneous resources that are no longer needed.
Deployment phase
Our deploys are handled by a tool built at GoSquared called Deliver. We’ve scripted Deliver’s config so that it grabs an up to date list of the servers currently running the project in production. These servers become deploy targets for the project. Deliver pushes the build to these servers either in parallel or sequentially for zero-downtime rolling deploys, and restarts the app on each server using upstart.
We have a significant amount of monitoring around our apps (using CloudWatch, ServerDensity, Graphite, Ganglia and PagerDuty) so if a deploy goes wrong, or the new version of the app is crashing, we’ll immediately be alerted and can roll back to a previous version if necessary. We can do this by reverting the master branch back to the previous stable tag.
Wrapping up
By and large, this process works for the vast majority of our day-to-day deployment needs.
The great parts
- Using this deployment process, we’re able to deploy code to production with simply a git push.
- The developers can remain developers without worrying about any ops work.
- Our infrastructure is dynamic, and changes all the time. Servers come up and go down subject to load and auto-scaling policies. This process can handle this variability, and always deploys to the correct servers hosting a project.
- Additionally, when new servers come up, they can always install the latest version that was deployed from a pre-built archive. This means that setting up the app is fast when being brought up on a fresh server.
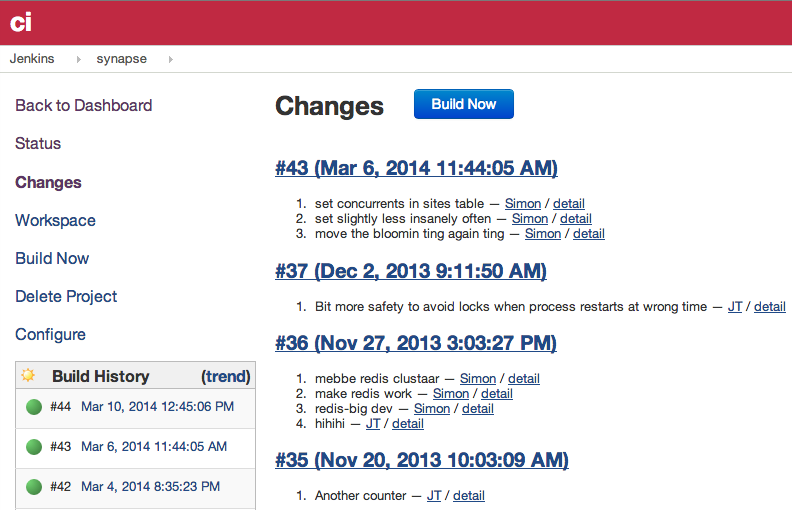
- Jenkins tracks the history, status and logs of our builds, so if anything goes wrong we can easily go in and see what the problem was. We can keep track of exactly when each deploy was made which is useful if you have many people pushing code to production.
- Jenkins is also a convenient point of integration into productivity tooling. We’ve integrated it with Slack via Hubot, allowing us to deploy projects directly from our chat channels and get feedback directly back in the room.
 This is ideal for convenience as well as visibility to the team on what’s being deployed and when.
Of course, it’s not always perfect for every kind of scenario.
The tricky parts
- If major versions of a project need to be deployed, they might be incompatible with what’s currently running in production, or require some further migration in some way (e.g. a database change). These kinds of deploys still need to be handled manually. Usually we’ll put together a release checklist where we use a combination of CI deploys and manual ops in the right order.
- It took a lot of trial and error to set things up and get them running smoothly through the CI. It takes patience and hard work!
Links
Jenkins CI
Doony theme for Jenkins CI
Deliver
Hubot
GitHub
Slack – $100 credit with this link